Time has been limited for rolling stock construction, with most of the time being reserved for getting the railway up and running. I did manage to convert another vintage 70's built wood wagon I inherited from Arthur, and this time I made a proper load for it. For Christmas I received some actual lumps of coal ! My Brother thought it'd be a cruel joke, having a difference of opinion regarding politics, but I had the last laugh :) It turned out to be the best gift he has ever given me, now I'm stocked up on coal and able to fill my wagons with what I believe to be a very convincing load. Simple to make, cut a foam poster board to roughly the shape of the inside of the wagon, push it in about 1/2", paint it black, smash some coal into appropriate sizes, apply PVA glue and you're Set ! A photo below shows one of his unfinished wagons, so you get the idea of his method of construction. Now back to layout wiring :(
Wednesday, February 8, 2017
Coal Load for a Wagon
Evening All,
Time has been limited for rolling stock construction, with most of the time being reserved for getting the railway up and running. I did manage to convert another vintage 70's built wood wagon I inherited from Arthur, and this time I made a proper load for it. For Christmas I received some actual lumps of coal ! My Brother thought it'd be a cruel joke, having a difference of opinion regarding politics, but I had the last laugh :) It turned out to be the best gift he has ever given me, now I'm stocked up on coal and able to fill my wagons with what I believe to be a very convincing load. Simple to make, cut a foam poster board to roughly the shape of the inside of the wagon, push it in about 1/2", paint it black, smash some coal into appropriate sizes, apply PVA glue and you're Set ! A photo below shows one of his unfinished wagons, so you get the idea of his method of construction. Now back to layout wiring :(
Sunday, January 29, 2017
Control Panels !
Hello everyone !
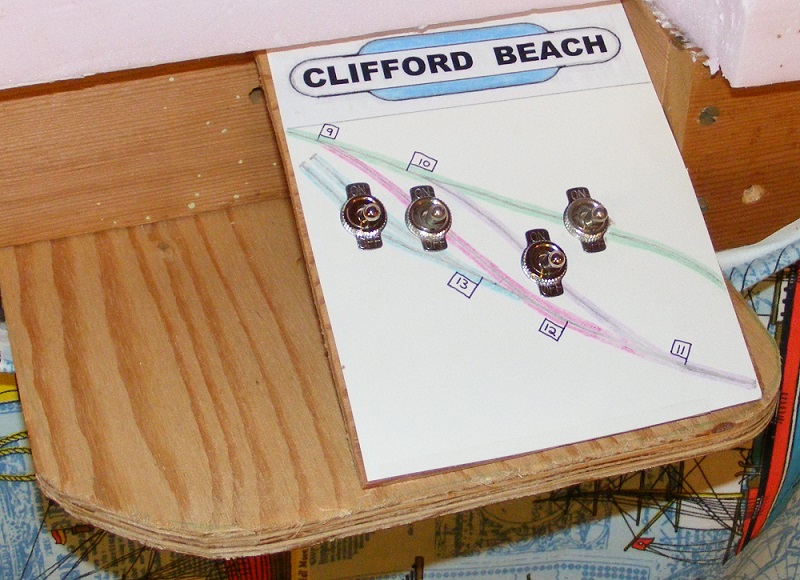
Been a very busy few months, haven't had much time to work on the railway, but I managed to find a little in the last few weeks to do up my control panels. Very simple, DC block control, just have the basic track diagram, and section switches with the lines colour coordinated for each block. I'm no artist so it's very basic, but easy and simple to use, which I like very much ! Made from 1/4" ply, cut to shape, with drilled holes for the toggle switches, and the track diagram drawn on white card laid on top. In time I'll add the signals into the diagram, and a timetable with operating instructions located at the bottom.
And this is one major reason for the lack of time, the newest employee of the BBR ! " Niki "
Tuesday, January 10, 2017
My Route To O scale
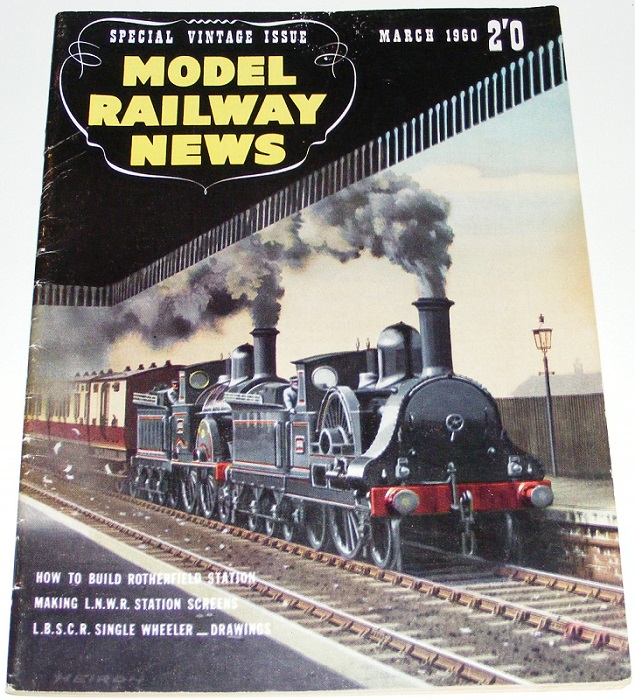
Beginning the new year, I was pondering my "model railway career" through the years that has led me to O scale. I've tried many different scales, gauges, and prototypes. However the turning point was when I purchased a vintage magazine, Model Railway News March 1960.
Inside that issue was a superb railway built by S.J. Dickson, O Gauge in a Small Space. I had attempted to build an O scale layout once before, a huge layout some 36' x 14', way to much for me and I gave up, ripped it all up and went HO. This article showed that a very nice O railway could be built in just a small space, 14' x 10' (which now happens to be the size of Boxer Bay)
There is one particular quote from the article that stuck with me and heavily influenced my decision to stick with O, "I think there is a minimum satisfying size for a model and to me that is 7mm scale." After all these years I agree 100%, you just don't get the same feeling with a model of anything in the smaller sizes, be it a car, building, or even figure. I know I'm in O scale for life.
There is no other size as Satisfying !
Inside that issue was a superb railway built by S.J. Dickson, O Gauge in a Small Space. I had attempted to build an O scale layout once before, a huge layout some 36' x 14', way to much for me and I gave up, ripped it all up and went HO. This article showed that a very nice O railway could be built in just a small space, 14' x 10' (which now happens to be the size of Boxer Bay)
There is one particular quote from the article that stuck with me and heavily influenced my decision to stick with O, "I think there is a minimum satisfying size for a model and to me that is 7mm scale." After all these years I agree 100%, you just don't get the same feeling with a model of anything in the smaller sizes, be it a car, building, or even figure. I know I'm in O scale for life.
There is no other size as Satisfying !
Saturday, December 31, 2016
2016 Summary ~ Trackwork Complete
End of the year already ! Can't be, can it ? It's been a very busy couple of months, but our track gangers have worked miracles and all the track has now been laid ! Of course there is a lot of cosmetic work to be done, additional sleepers, touch ups, rail / sleeper painting & weathering, and then the fun task of ballasting ! Very happy with the progress so far, it has gone quicker then originally feared ! Also looking forward to wiring, and getting to some scenery. Those will be the goals for 2017, ballasting, wiring, some basic scenery, & a couple structures. Happy New Year !
Tuesday, December 13, 2016
Christmas Came Early
Morning All,
Well Christmas came a little early here in Oregon.
I received my Minerva Models Kerr Stuart 0-6-0T Victory class locomotive, and what a little beauty ! But I'll let you see it for yourself in action, here is the first in hopefully a montly video report on the Boxer Bay Railway - Enjoy !
Well Christmas came a little early here in Oregon.
I received my Minerva Models Kerr Stuart 0-6-0T Victory class locomotive, and what a little beauty ! But I'll let you see it for yourself in action, here is the first in hopefully a montly video report on the Boxer Bay Railway - Enjoy !
Friday, December 9, 2016
Opening Day ! :))
Announcement for Boxer Bay & Surrounding Area Residents !
The Railway is now open for business. December 8th, 1916 marked the ribbon cutting ceremony.
The Railway was officially opened by the Mayor of Boxer Bay, & Col. Stephens, who constructed the line of 32 miles. The Colonel admitted there is still work to be done ~~ just a few things like platforms, station buildings, signal boxes, signals, ballast, wiring, making the bridge structurally sound, loco facilities, tunnels, finishing track installation, building the docks, oh, and coaches for the passengers !
"All in Good Time" the Col. was quoted as saying. But at least we can now offer services from nowhere to nowhere ! It is fun to see a train run, even if the, uh, stock formation is a little odd ! Note the authentic Band that was engaged for this historic occasion ! Time to start painting up the Omen Figures I think !
Opening Ceremony ~ Complete with Authentic Band !
~ Nothing Dangerous about this ! ~
Under Construction - To Be Finished in 10 Years ~ Give Or Take a Few
Subscribe to:
Posts (Atom)